Managing .gitconfig For Fun And Profit
You know when you see that little green ‘Verified’ badge next to your commits on GitHub? The one that makes it feel all official? Notice how when you commit and push from the command line you don’t get that by default? If you’ve ever wondered why, this post is for you! Also if you realise that signing your commits is a good idea generally because something something security… It works for you too.
Prerequisites
- gpg installed on the system you’re setting up commit signing from (
gpg --versionorgpg2 --versionto verify) - The ability to reach GitHub. This can be from the same machine, or you can be SSHed in, you’ll need to copy an exported key from the commandline to a browser window and you don’t want to type it all out…
1 - Generate the Key
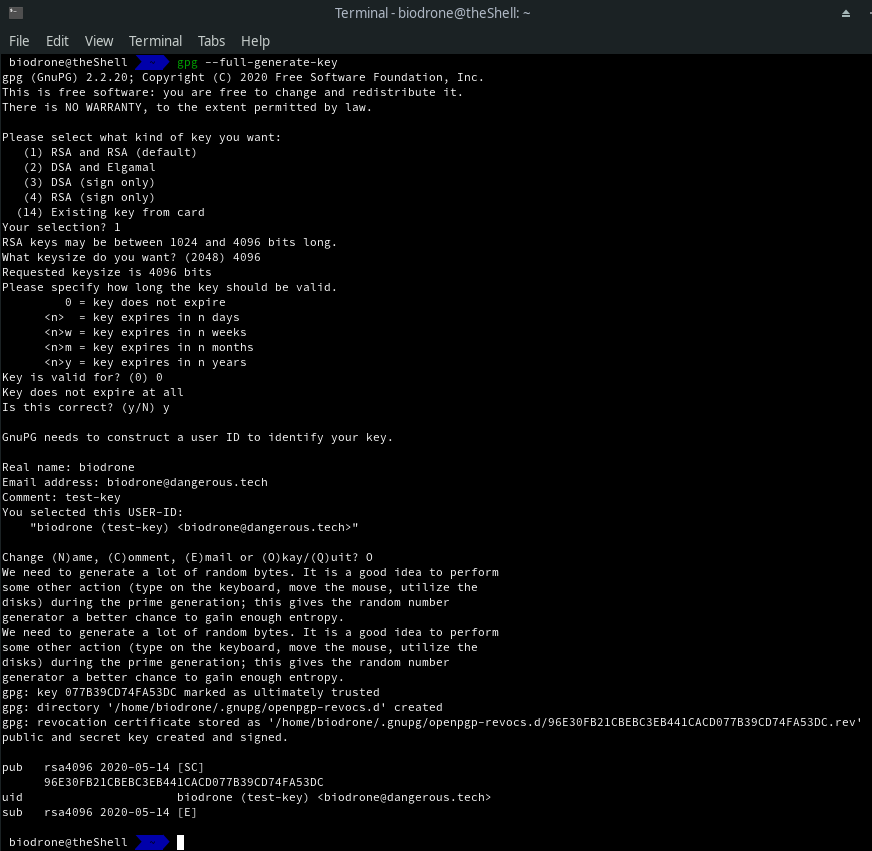
Run gpg --full-generate-key to kick off the process. Make sure that you make your key 4096 bits, GitHub won’t accept anything less. (I believe that all gpg commands can be substituted for gpg2 from this point onwards but I haven’t fully tested that so YMMV)
2 - Export the Key
Now we need to export the key in a format that we can give to GitHub.
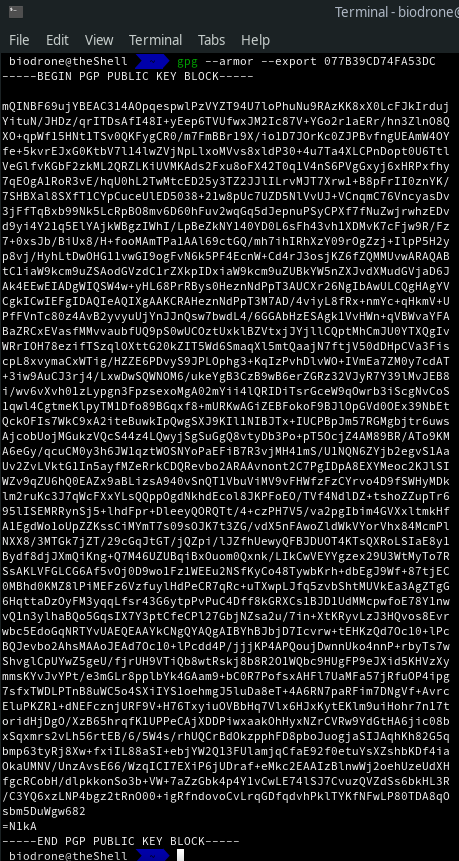
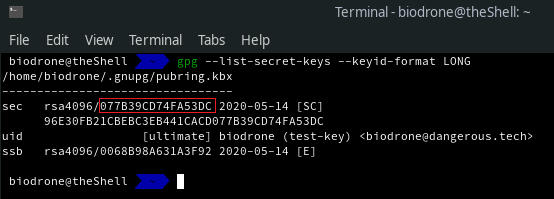
gpg --list-secret-keys --keyid-format LONG will give you a list of your secret keys, copy the ID in the same place as the red box in the screenshot and run the gpg --armor --export YOURIDHERE to get the GitHubbable part. Copy this key, all the way from -----BEGIN PGP PUBLIC KEY BLOCK----- to -----END PGP PUBLIC KEY BLOCK-----
3 - Upload Key to GitHub
This is assuming that you’re using GitHub here, you would have to upload this in basically the same format to BitBucket or wherever else.
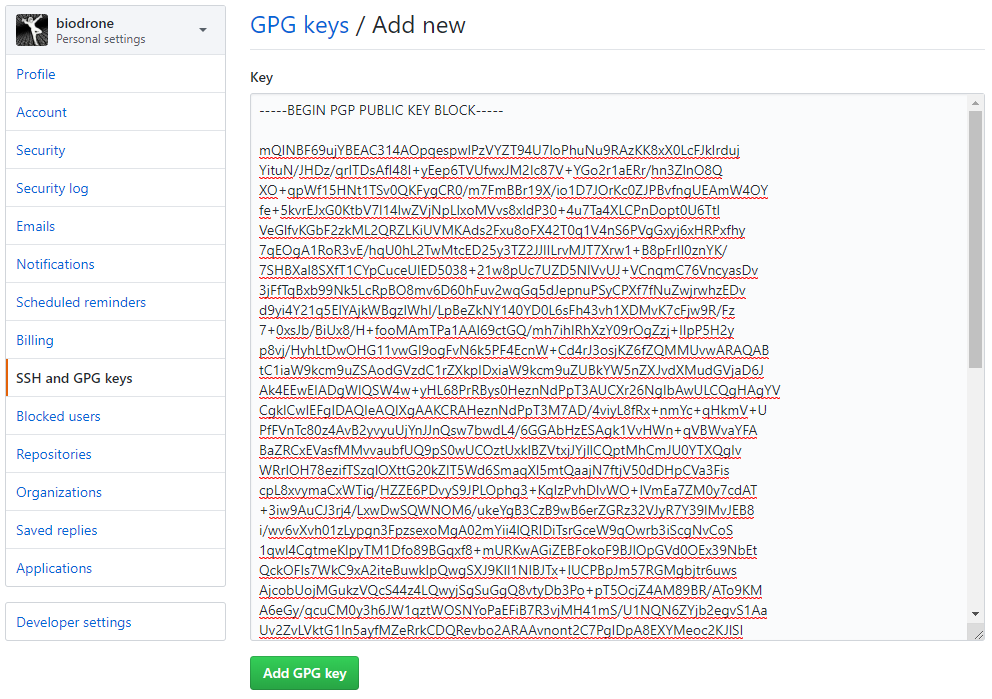
Head to https://github.com/settings/keys and locate the GPG keys section. Click New GPG key.

Paste in the exported key from the previous command into the box and click Add GPG key once again.
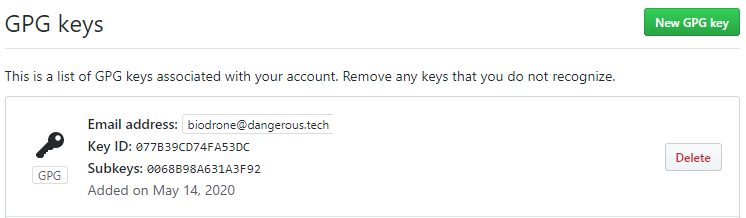
Verify that the key is now showing in the GPG keys list and has the correct email address associated with it.
4 - Complete Git Config
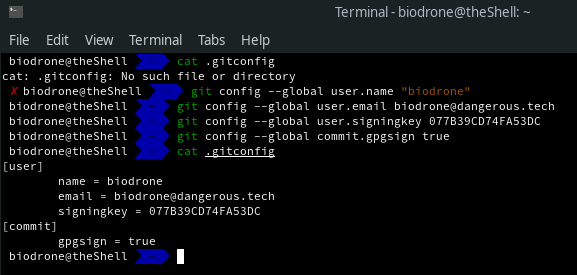
Check that you don’t already have a .gitconfig file using cat. If you do, you can probably skip some of these config steps. The last 2 are the key ones here. Use the same Key ID and for the signing key that you used in the export command from step 2.
git config --global user.name "your name"
git config --global user.email your@email.address
git config --global user.signingkey YOURIDHERE
git config --global commit.gpgsign true
5 - Do All The git Things
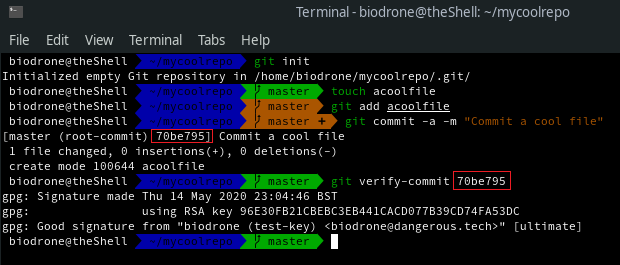
Commit, Commit, Commit! You can verify the commit using git verify-commit commitid