Pan-dev-mic?
So, assuming that you’re living in the world right now you’re probably either working from home, furloughed or have been laid off. My condolences to those not in the first category, although financial troubles aside, enjoy your increased free time. I’m in the 100% working from home category, which means I have all of my Raspberry Pis, microcontrollers, PC builds and such laying around me but I have my work laptop hooked up to the main I/O in this room. Short of buying a high quality KVM that supports all the I/O that I would want to be able to switch between them quickly (shoutout Level1Techs store if you’re in the market), I don’t really want to have 3 laptops open at once to be able to access all the different dev environments I need for testing (I’ve definitely done that in the past though…).
The Solution
Enter VS Code. I’ve used VS Code as my main IDE for basically everything for over a year now. It’s a brilliant environment for editing any kind of code, there’s always tonnes of plugins and the application itself is stable yet has frequent updates. They also seem to listen to what the dev community really wants as added features and (I hope you’re sitting down) actually add them!
I’d heard about the Remote Dev features on a few podcasts a while back but I’d never really had the need to try them out. I’m always working on Linux machines so it’s pretty easy to spin up a venv or a container and test my code. But these days, on the work laptop, I’m chained to Windows! No WSL either, the higher ups think that’s the devil or something so we’re stuck with Billy Basic Winblows 10. The saving grace? OpenSSH being included with Win10 since 1709 or something like that. This means that anything we can SSH to, we can develop on!
Prerequisites
- Obviously make sure you’ve got VS Code installed. It’s
codenow on the Arch repos,vscodein Chocolatey and it’s also available as a--classicsnap (ascode) wherever snaps are sold. - Make sure you can SSH to whatever device you’re trying to develop on. Most corporate VPNs have breakouts for 192.168.0.0/16 at least, with some opting for 172 or 10 range split tunnels depending on what the corporate ifrastructure is running wherever you are, so you may very well be able to get to your device with no troubles.
- The credentials for a user on the dev device (obviously?).
1 - Find the Extension(s)
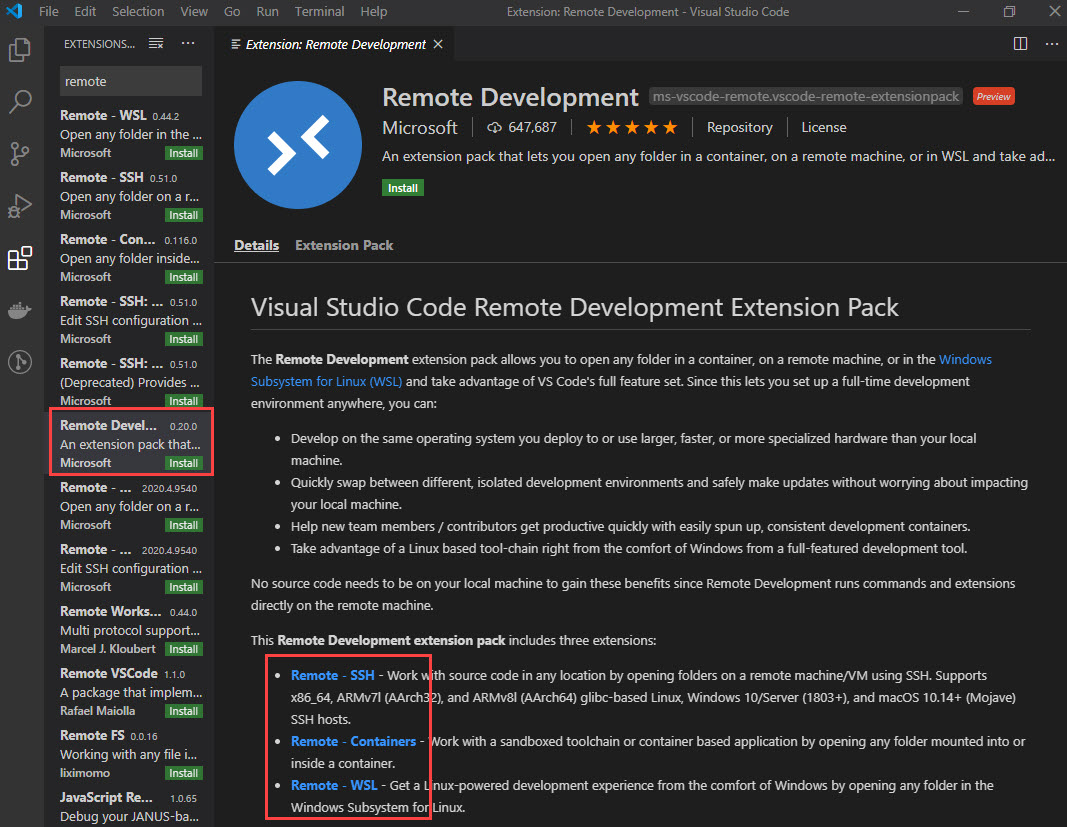
VS Code has 3 remote dev extensions:
- SSH
- Containers
- WSL
Obviously you can just choose whichever one you like from those 3, or they have the extension, pictured above, which is basically a meta package and will install all 3. I did notice that when I went to install the meta packadge, SSH and Containers installed fine but WSL hung for quite some time and I wound up having to reload the window. I’d say if you don’t have WSL activated, don’t bother trying to install that one. Install whichever are relevant, we’ll be going through SSH configurations specifically in this post.
2 - Add A New SSH Connection Pt 1
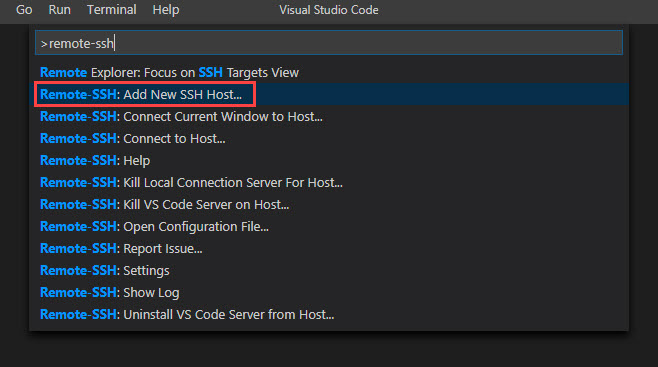
Open the command palette (F1 or Ctrl + Shift + P) and search for remote-ssh. You’ll want to select Add New SSH Host....
3 - Add A New SSH Connection Pt 2
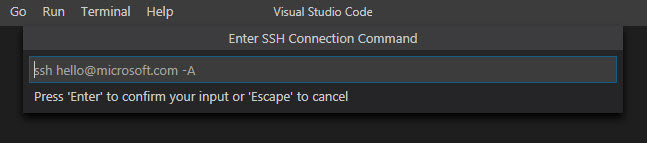
Now, as the example says, go ahead and input the command required to connect to the server. Just ssh user@domain should be enough here. I haven’t tried it but I assume that you could use Mosh here if you didn’t have a particularly stable connection to the remote host.
4 - Add A New SSH Connection Pt 3
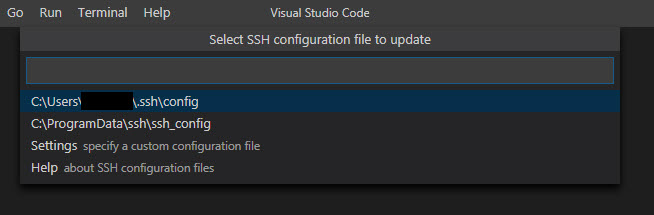
Now you’ll want to select which SSH Config file to update. Either is probably fine, I tend to go with the former because it’s user specific. You’ll definitely want the first option if you’re on a multi-user machine.
5 - Add A New SSH Connection Pt 4
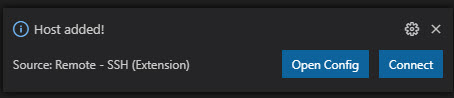
You’ll now notice this little toasty boi in the bottom right of your screen. If you want to use SSH keys to access your remote machine, click ‘Open Config’ and continue with the optional steps. If not, skip em and head to step 9, just enter the password each time you connect.
6 - Open The SSH Config File (OPTIONAL)
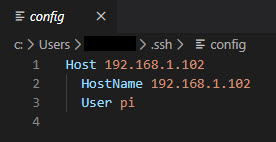
Looks like any old SSH Config file, nothing to see here.
7 - Get You An SSH Key, Son (OPTIONAL)
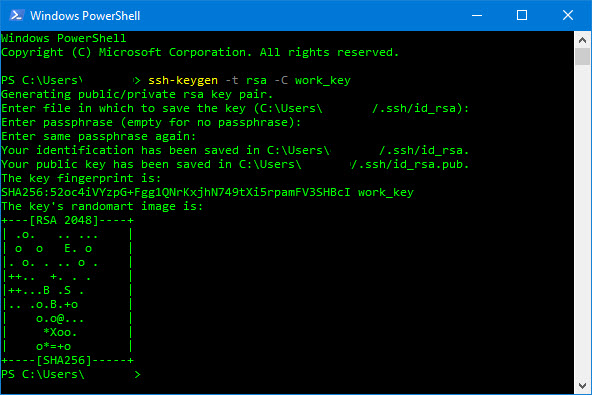
With the magic of OpenSSH, you should have the ssh-keygen command available to you. Use powershell (or cmd if you’re a peasant…) to generate an SSH key using ssh-keygen -t rsa -C key_comment. Follow the prompts, set a passphrase if you like (I left mine because this is only a Raspberry Pi and I don’t really care if I lose this key to it) and specificy a save location and you’re good to go.
8 - Add Your SSH Key To The SSH Config File (OPTIONAL)
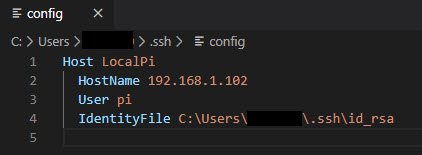
Hope you remembererd where you put that SSH key, you’re going to need that path right about now. Add a line to the SSH Config file as in the screenshot, just needs to be IdentityFile path/to/key/file. You’ll notice I also changed the Host portion of mine, you can change this to whatever you like, just keep the HostName address the same.
9 - Begin The Remote Connection
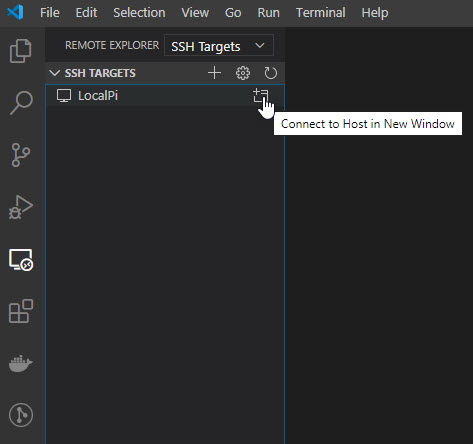
Finally, right? All this prep and now you can finally initiate the connection! Head to the Remote Explorer and you should see the connection you’ve just added (displayed based on that Host line in the config).
10 - Confirm The Remote OS
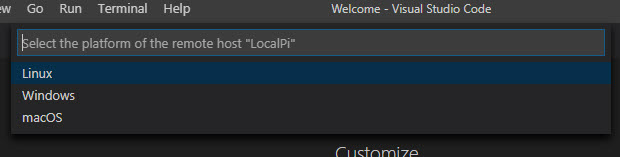
Apparently sometimes VS Code will autodetect this, but I had to confirm it every time I’ve used this feature so far so who knows… Just select the right platform, hit enter and you’ll be on your way.
11 - Confirm The Remote Fingerprint
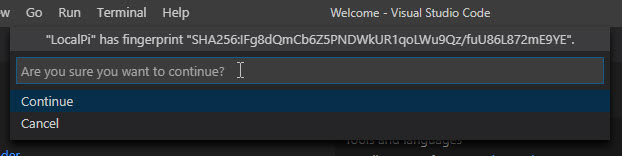
Unless you’ve already SSH’ed to this host and have it’s details in your known_hosts file, you’ll need to confirm it now.
12 - Enter Your Password
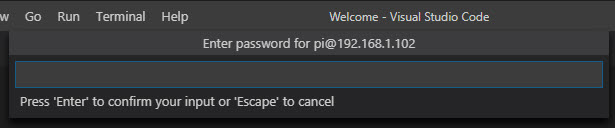
Now is the time. SSH key users, this is the last time you’ll have to enter a password to connect (unless you added one to your SSH key but I can’t stop you there, I’m not your dad).
13 - The Install Begins
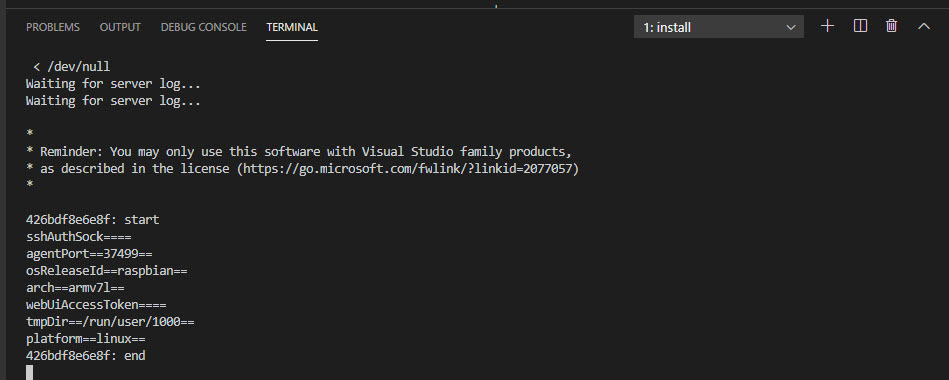
It turns out that VS Code dumps a bunch of nonsense on the remote machine in order to make the remote dev environment work. If you open the terminal now, you’ll be able to see if doing it’s work.
14 - Open The Home Folder (OPTIONAL)
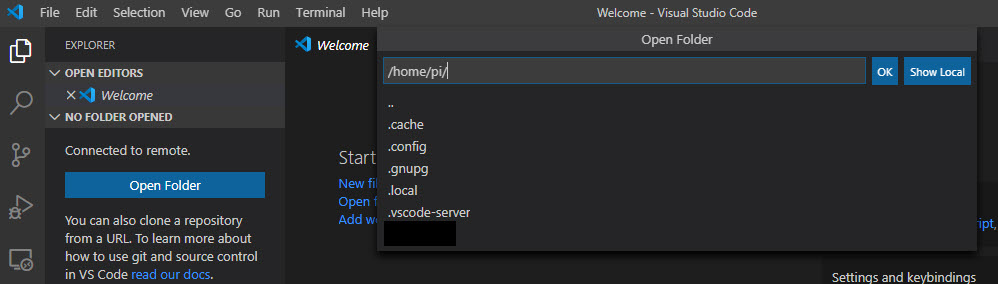
Another one for you SSH key users. I’m assuming here that you haven’t already added this key to the authorized_keys file on the remote machine. If you have skip to step 19. If not, click ‘Open Folder’ and open the user’s Home dir (or their .ssh dir if they already have one).
15 - Create The .ssh Directory (OPTIONAL)
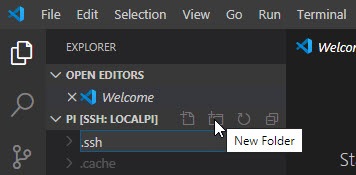
This one’s not rocket science, create a new folder called .ssh within the Home dir if it doesn’t already exist.
16 - Create The authorized_keys File (OPTIONAL)
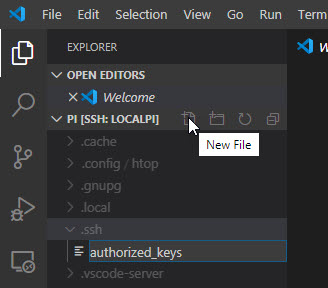
Now create a file called authorized_keys (again, if it doesn’t already exist - if it does, just edit it).
17 - Copy Ze Public Key (OPTIONAL)
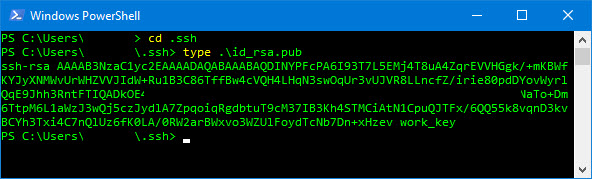
Echo out the public part of the key that you created earlier (type filename on windows, cat filename on *nix).
18 - Paste Ze Public Key (OPTIONAL)
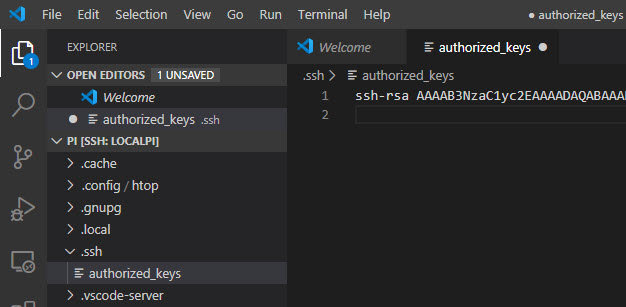
Paste that key into the authorized_keys file. Just the bit beginning with ssh-rsa and ending with whatever your comment was from when you created the key.
19 - Close The Remote Connection (OPTIONAL)
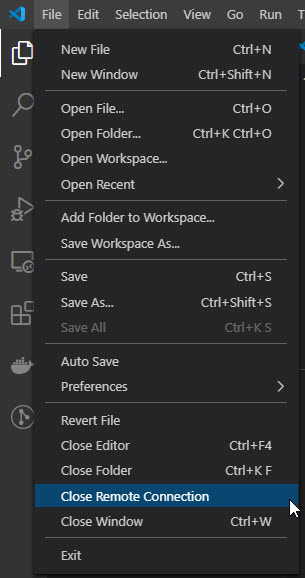
Now, close the remote connection. We’ll reopen it using our key to authenticate, and you don’t get the instanst gratification of seeing that in action unless you close the window. Ashes to ashes, dust to dust, tis the circle of life, my friends.
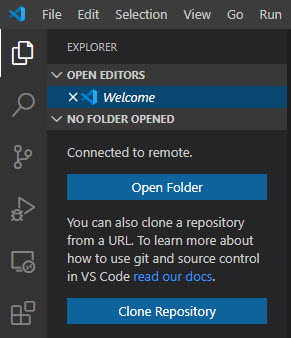
20 - Remove The Folder From VS Code (OPTIONAL)

VS Code remembers the home folder you were just in but unless you run your code straight out of there (which you don’t…… do you….?) then you don’t need this in the history.
21 - To Open Or To Clone? (OPTIONAL)
Now, relaunch the connection the same way you did in step 9, except this time you won’t have to do any of the additional nonsense. You should connect straight in and be greeted with the File Browser. Either open a folder which already has a coding project in or clone one, the decision’s all yours.
22 - A Point About Extensions
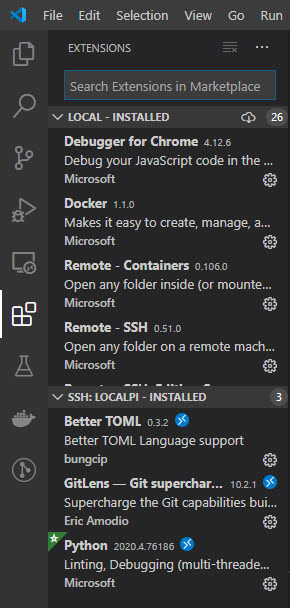

You’ll now notice if you open the extensions sidebar you have a section for local extensions and one for your remote machine. Any extensions that you need for debugging, building, executing, etc need to be installed on the remote machine. Anything that just syntax highlighting, linting, etc will work just fine on the local machine. Every time you install en extension while you’re connected to a remote host, it will install it both on the local machine and the remote by default. If you select the extension to bring up the page properly, you get the option to just install on the remote, should you wish.
I always like to have GitLens on the remote machine because then it can keep the state of the repo on the remote machine in check. See the post about setting up your .gitconfig(I’ll link this when it’s live) for more information on Git config in general.
23 - Final Interface Walkthrough
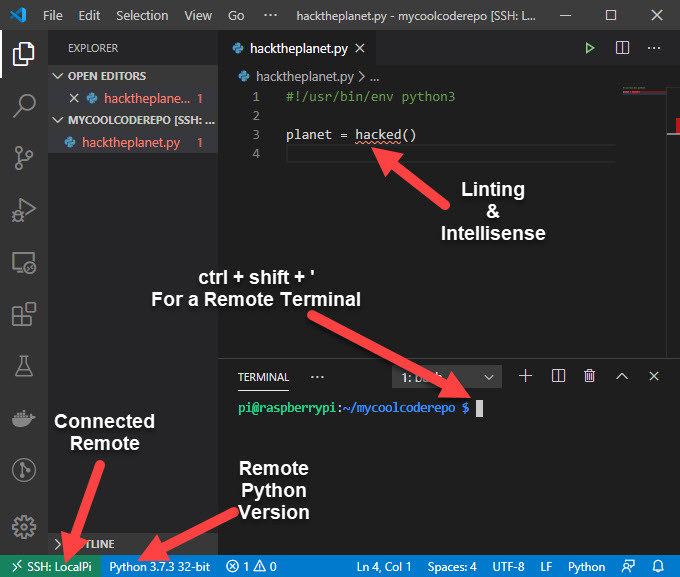
I’ll leave you with a few pointers on the final interface. Hack the planet!